
Understanding Vapor Barrier Installation
What is a Vapor Barrier?
A vapor barrier is a crucial element in moisture management for homes, particularly in areas like crawl spaces and basements. This barrier is typically made from materials such as polyethylene plastic sheets, which are designed to resist water vapor transmission. By placing a vapor barrier between the ground and the crawl space or in basement walls, it helps to prevent moisture from seeping into your home’s living areas. The primary function of a vapor barrier is to minimize humidity levels and protect structural integrity by keeping mold and mildew at bay.
Importance of Vapor Barrier Installation
The significance of Vapor Barrier Installation cannot be overstated. When installed correctly, vapor barriers serve as a preventative measure against moisture-related issues. These can include wood rot, electrical problems, and health concerns from mold spores. Furthermore, without proper vapor barriers, energy efficiency can be compromised, as excess moisture can make temperature control harder and lead to increased cooling and heating costs. In essence, a vapor barrier enhances the longevity of your home while ensuring a healthier indoor environment.
Types of Vapor Barriers
There are several types of vapor barriers, each designed for specific conditions and materials. The most common types include:
- Polyethylene sheets: Thicker sheets (typically 6 to 20 mils) are generally durable and offer excellent moisture resistance.
- Foam board: Used more in insulated walls, foam board can also act as a vapor barrier depending on its installation and thickness.
- Sprayed-on barriers: These are liquid-based vapor barriers that are sprayed directly onto the surface, forming a seamless protective layer.
- Self-adhesive barriers: Often used in conjunction with insulation, these products can be added to seams to enhance moisture resistance.
Preparing for Vapor Barrier Installation
Assessing Crawl Space Conditions
Before beginning the vapor barrier installation, it is essential to assess the conditions of your crawl space. Check for existing moisture issues, pests, or structural concerns. Look for signs of mold growth, high humidity levels, or water pooling. Additionally, evaluate how well-ventilated the area is; poor airflow can exacerbate moisture problems. Taking accurate measurements of the crawl space and identifying any potential sources of moisture are critical steps to ensure effective installation.
Essential Tools and Materials
Having the right tools and materials on hand is vital for a successful vapor barrier installation. Required items typically include:
- Vapor barrier material (polyethylene or another suitable type)
- Utility knife or scissors
- Measuring tape
- Duct tape or adhesive for securing seams
- Safety gear (gloves and mask, especially for working in closed spaces)
Consider also having a moisture meter handy to verify humidity levels before and after installation.
Safety Precautions
Safety should always be a priority during any home improvement project. When working in crawl spaces, adhere to the following precautions:
- Wear appropriate protective gear such as gloves and masks to shield against dust, mold, and harmful allergens.
- Ensure proper lighting to avoid trips or falls.
- Be mindful of your body positioning and ventilation within the crawl space to prevent discomfort and breathing issues.
Step-by-Step Guide to Vapor Barrier Installation
Removing Debris and Moisture
Start the installation by clearing the crawl space of any debris, such as leaves, rocks, or construction materials. This step is crucial because a clean space enhances adhesion and reduces moisture accumulation. Furthermore, address any moisture present—consider using a dehumidifier or fans to help dry the area as needed. Pay special attention to corners and hidden spaces where water may accumulate.
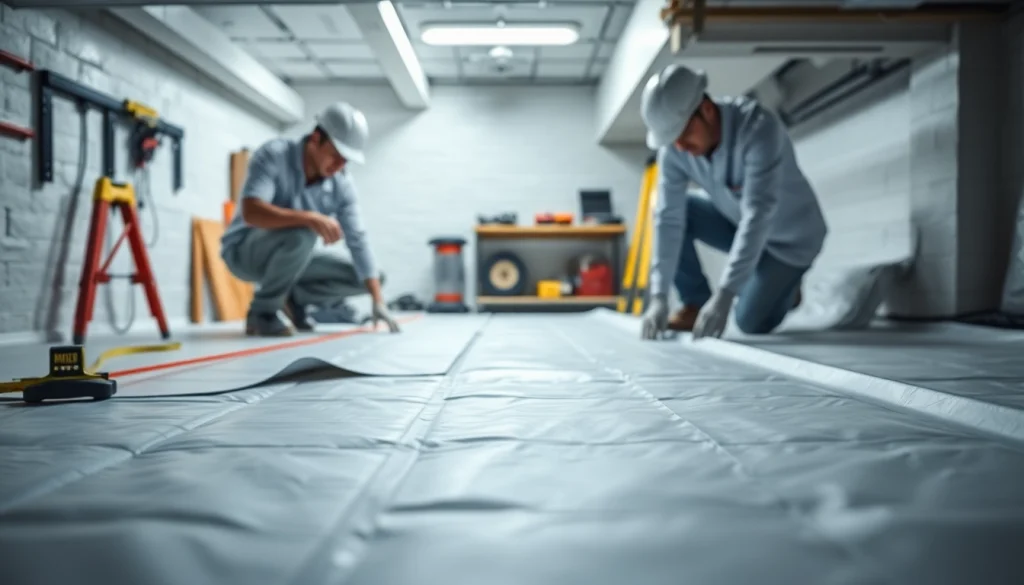
Laying the Vapor Barrier
Once the area is clean and dry, begin laying down the vapor barrier. Start at one end of the crawl space and unfold or roll out the barrier across the entire ground surface. Ensure that the sheets overlap by at least 12 inches, especially at seams. This overlap helps reinforce water resistance. Anchoring the barrier’s edges against foundation walls, using stones or tape, secures it further against movement.
Sealing and Finishing Touches
After the vapor barrier is laid out, the next step is sealing all seams and edges thoroughly. Use duct tape or a commercial adhesive specifically designed for sealing vapor barriers. Proper sealing ensures that moisture can’t seep in through the joints. Finally, double-check that the entire area is covered, and make any necessary adjustments to achieve a tight fit. Once done, perform a final inspection to confirm everything is in place.
Common Challenges in Vapor Barrier Installation
Dealing with Uneven Surfaces
Uneven surfaces can complicate vapor barrier installation, leading to gaps that may allow moisture infiltration. To tackle this, consider leveling the ground with sand or gravel to create a flat base. Additionally, using thicker vapor barrier materials may help accommodate minor imperfections in the substrate.
Addressing Moisture Issues
If moisture persists despite installation, it is essential to identify the source. Inspect for leaks in plumbing, drainage issues, or groundwater rising before sealing the crawl space. Implementing proper drainage systems, such as sump pumps or channel drains, may be required to mitigate moisture challenges effectively.
How to Ensure Proper Sealing
To achieve effective sealing, carefully follow the manufacturer’s instructions. Ensure that all seams overlap adequately and are securely taped. It may also be beneficial to inspect the barrier after installation during periods of rain or high humidity to confirm that no moisture is seeping through the seams or edges.
Maintenance and Performance Metrics
Inspecting Your Vapor Barrier
Ongoing inspections of your vapor barrier are crucial for maintaining its integrity. Conduct these checks at least annually or after significant environmental changes, such as heavy rains or flooding. During inspections, look for tears, punctures, or any signs of moisture intrusion that could signify underlying problems.
Signs of Wear and Tear
Be alert for several indicators of wear on your vapor barrier. Common signs include visible holes, sagging, or water spots on the top surface. If you detect significant issues, addressing them promptly with repairs or replacement is vital to avert more extensive moisture problems.
Improving Indoor Air Quality
Alongside moisture protection, a properly installed vapor barrier can significantly improve indoor air quality. Reducing humidity levels minimizes mold growth and allergens, contributing to a healthier living environment. Moreover, implementing a regular maintenance routine will likely result in better energy efficiency, ultimately lowering utility costs.
Frequently Asked Questions
1. What is the average thickness of a vapor barrier?
The typical thickness for a vapor barrier ranges from 6 to 20 mils, with thicker materials providing enhanced durability and moisture resistance.
2. How often should I inspect my vapor barrier?
It is recommended to inspect your vapor barrier at least once a year and after significant weather events to ensure it remains intact and effective.
3. Can I install a vapor barrier myself?
Yes, many homeowners can install vapor barriers independently with basic tools and proper instructions, although professional assistance can ensure optimal performance.
4. What happens if my vapor barrier is damaged?
If damaged, it can lead to moisture problems like mold and wood rot. Prompt repairs or replacement are crucial to maintain moisture control.
5. Are there any alternatives to a vapor barrier?
Alternatives include dehumidifiers or active drainage systems, but they may require additional maintenance and do not provide the same direct ground moisture barrier as a vapor barrier.